Moto G5S plus is an awesome device with some great features and awesome design. The software of the phone is also very fluid and smooth. The software is so simple that you might miss features you get on other phones say Redmi Note 4. So to get the best out of your Android phone here is a tutorial on how to root your Moto g5s Plus without PC or in other words Root Moto G5s Plus.
This tutorial only works for the phones with Nougat installed, once Oreo comes, we will make a tutorial on how to root with Orreo as well.
Downloads for Root Moto G5s Plus-
ADB folder- https://bit.ly/latestadb
Magisk Zip file- https://forum.xda-developers.com/apps…
Magisk Manager app- https://goo.gl/GkKcgb
TWRP recovery- https://forum.xda-developers.com/moto…
Root Moto G5s Plus without PC
Step 1 – Go to settings, about and tap the build number repeatdy for 6-7 times. After doing this, you will get a message saying you are a developer.
Step 2 – Now go back to settings and just above about us, you will see Developer options. Go to developer options and toggle on USB debugging.
Step 3 – Switch Off the device.
Also, Read – Logitech X50 Portable Bluetooth Speaker Review!
Step 4- Once switched off, Turn on the device by holding the power button and the volume down button at the same time. Now you will go into fast boot mode. Connect your USB cable to the phone and the other end in the PC.
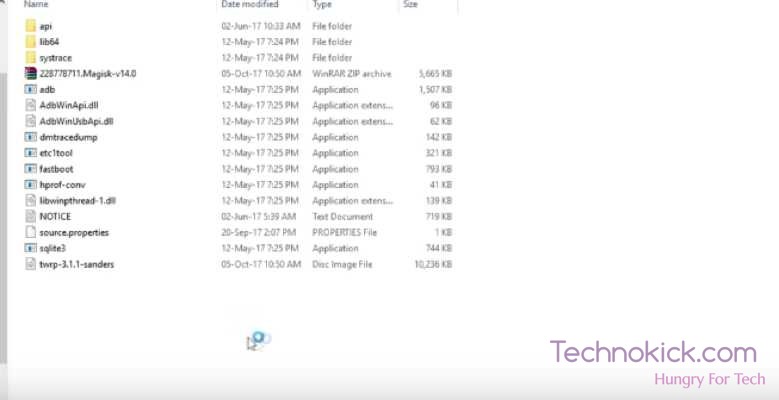
Step 5 – Now download all the files mentioned above except the App. Now extract the folder named platform-tools-latest-windows to any folder on your PC.
Step 6 – Now rename the twrp file to technokick.img
Step 7 – Now copy the other two files, that is the Maicisk file and the technokick file to the extracted folder.
Step 8 – Now in the folder, Press shift and press right click on your mouse. Now you will see an option called Open Powershell window here. Enter the following code in the window
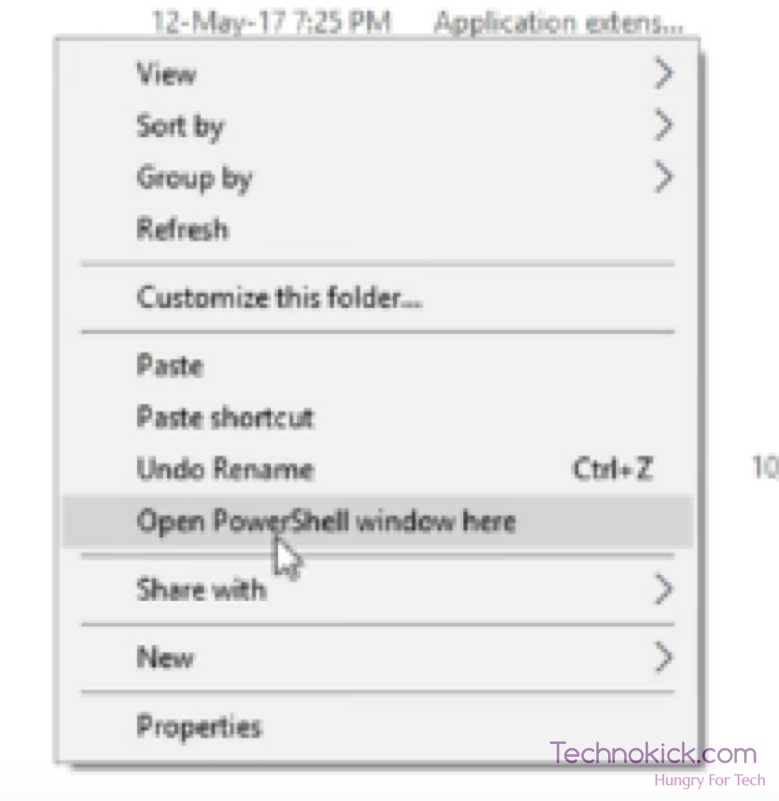
fastboot devices
fastboot flash recovery technokick.img
Step 9 – Now go to TWRP and backup your data. After that go into Wipe, Select format data. Now reboot your phone.
Step 10 – Now you should land on TWRP again. Connect your phone to the PC and copy the Magisk zip file into your internal storage.
Step 11– Now in your phone, Open TWRP, go to install and select Magisk zip file and select swipe to flash.
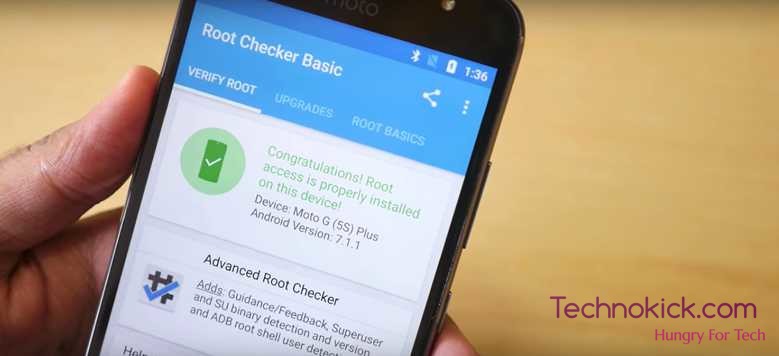
Step 12 – Now Reboot your system to the system. After you have set up your phone, Install the app, Magisk manager apk on your phone. You can find the link above. After that, your phone should be successfully rooted. Now you have successfully Rooted Moto G5s Plus.
If you are facing any issue in Root Moto G5s Plus, let us know in the comment section below. We would help you to resolve it ASAP.
Source – Dhananjay Bhosale